Showing posts with label DIY. Show all posts

Empty ribbon rolls? Make pom poms!

12.26.2013

(Okay, so I lied about being off here until January. I just had a little project I needed to share!)

What happens when you use up all the ribbon from your rolls? You toss them right? (Into the recycling bin, I hope. But if it's the trash, I won't judge you too harshly.)

Instead, here's a super simple project that only takes a couple of things, and you can reuse these ribbon rolls! (Original tutorial came from here.) BAM!

You need: empty ribbon rolls, fluffy yarn, thin yarn (optional), scissors.


Instructions: Pull apart ribbon roll, use scissors to roughly widen the hole to 1". Pull about 7-10 arm lengths of yarn from ball, put both circles together and feed full length of yarn through hole. Continue wrapping yarn through hole and around outside - at least one time around or twice for a fuller pom. Cut ends of yarn, then slide scissors between ribbon roll circles and cut away yarn. Take a small piece of thinner yarn and slide between circles. Tie a knot. Then cut away or slide used ribbon roll circles off.


And your pom is made! This takes a little bit of time, but not too much thought or skill after you get the hang of it.

And how gorgeous is this little puff of wintry goodness?

I made mine into a garland (like the previous tutorial) using glittery gold snowflakes to hang in the space above our headboard. And I love it!


Happy re-using!

DIY etched glass Christmas ornaments

12.11.2013

I love personalizing gifts. Especially if it's something fun, pretty and still inexpensive! 

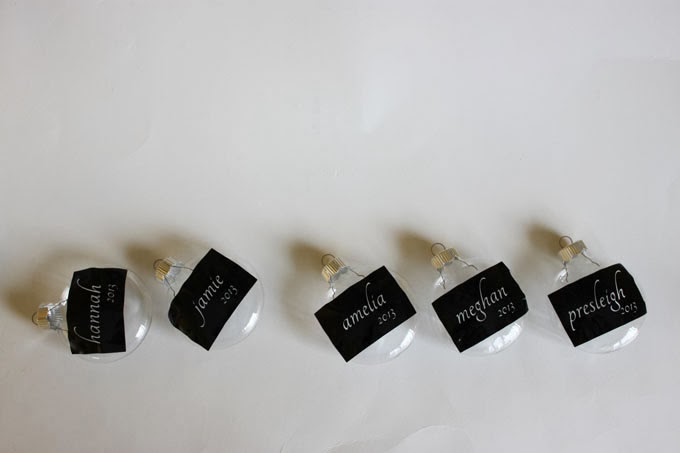
For all 6 of my piano girls, I wanted to try etching their names onto plain glass Christmas ornaments. My inspiration came HERE and the one and same vinyl dealer, the amazing Dana, hooked me up with the gorgeous stencils for the etching.

But, first, I found some ornaments at the hobby store. 50% off, thank you very much. Dana told me that the etching cream wouldn't work if they were covered in glass varnish, so I crossed my fingers and hoped they weren't.

Supplies needed: 
set of flat plain glass ornaments, unvarnished
vinyl stencils
etching cream
sacrificial paint brush
gloves


I didn't choose the glass orbs, but ones that were flatter, hoping that the stencils would stick better. All those curves aren't ideal for flat stencils! It was a good choice, although I still had to really smooth down the edges near the letters so the etching cream wouldn't leak through.


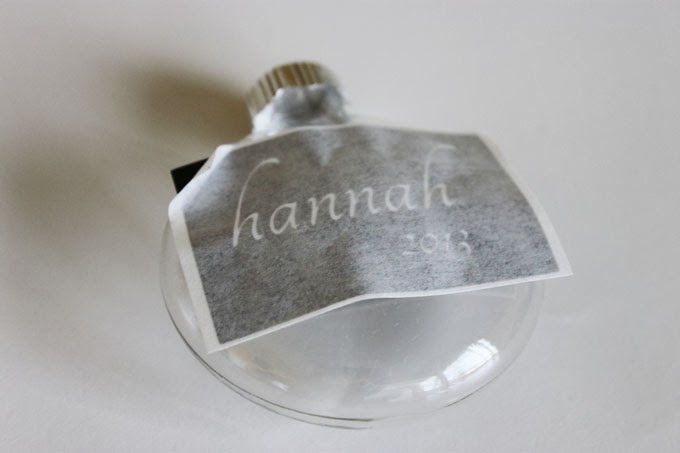
 I carefully peeled away the backing and smoothed down any edges that came up.


Then, using my throw-away paint brush and gloves, I brushed on a thick coating of etching cream. It had a tendency to pull away from some of the letters, so I had to keep a close eye on them and brushing it back so all of the letters would be etched.


Not all of the letters were perfectly etched, but they were more than good enough! Then, I filled them with old, shredded sheet music and looped some red and white baker's twine to hang them from. And I think they girls will be thrilled.

What I especially love about this project is that the possibilities are endless! You could fill them with fake snow, pearls, sand, confetti, etc. I think I'd love to do an ornament-a-year for Ladybug or for us (etch a different year on each) and then fill it with something that represents the year for us.


(Oh, and while I was at it, I etched "fleurs" (French for flowers) in an old vinegar bottle I'd saved for that purpose. Simple and sweet.

... And sort of addicting. "What should I etch next?!")


What would you etch??

DIY: Antique Barn Door Headboard

12.07.2013


Tools: Miter saw, saw horses, router, wood glue, finishing nails, a pneumatic staple gun, and your dad to do the trigonometric calculations.

Supplies: reclaimed wood, old barn door, 2x6 for French cleat, wood screws


Now someone just needs this beauty in their home!

blue gray vintage chair makeover

11.05.2013

:-) the last *finally!!* project complete.

This chair is the exact same as yesterday's white chair, but I painted this one first - it's a flat gray blue that is so pretty! However, it will probably need just the right (matching/complimenting) home.


 I don't know if you remember, but these chairs and the settee were a mess. Stinky, gross, ripped, cat-hair covered speckled nasty pieces of junk from the roadside. But I couldn't get past those lines! So I didn't even take them inside my house until they were stripped completely down and wiped off.

Actually, I took them to a friend's house and they sat there (for a year, ahem.) This one chair I kept in my house and was all fired up to sand and paint it.


Then it sat in my basement. For a year. Truly, I didn't have the right equipment (electric staple gun), so I did have to wait around for that. Then, when I did have it, the only time I was willing to do it was during naptime and with a noisy air compressor, that option was out...

Finally, however, I prevailed. :-) And after sweat and probably some tears, this gigantic upholstery challenge (well, it was for me anyway) is done!


I've listed it on CL and hoping it sells soon!! :-) Then I can drag over my chair from my neighbor's basement and maybe actually use it someday.

UPDATE (12/18/13): It's sold!

more "finally!" furniture transformations!

11.04.2013

It's been way too long since I started with these furniture pieces to practice my upholstery and diy skills on. Like a year and a half too long...

Anyway, they are done and they are sold!! I snapped a few pictures before they went away to make another house pretty.

The makeovers aren't perfect. There are some wrinkles in the upholstery and uneven spots in the paint, but I prevailed. I probably will never tackle a project like this again, but it was a good chance to learn. And practice. And decide that if I have to strip the chairs and purchase new foam it would be better to just. walk. away. 


I'll post the photos of my other identical chair that is gray this week. That one more chair to sell and they're outta my life! I am in love with all of this space I am accumulating. It's addicting.

last Market post: The Market

10.28.2013

This year's Market was a success. I need to say that because it was true. I made 3/4 of my goal (which was quite lofty) and made at least a little more than breaking even. But, I have to be honest, after working all of this year for this (and having almost double the merchandise), I was a little bit let down that more of my pieces didn't sell.

But, several things to lighten that load. There seemed to be a general consensus that sales were down with most of the vendors. It was really dead Friday afternoon/evening and many, many of the people that came in were white-hairs. Now, don't get me wrong, I love the oldies, but they aren't really interested in paying money for things they used to have and not many of them are interested in "in the moment" home decor. Also, people verbalized that they loved certain pieces but weren't sure where they would put it. I have to applaud this because 1) it's how I think and 2) I'm not into getting stuff just for the sake of having something pretty (see THIS post).

That said, I did have TONS of compliments and several people asked for my card, etc. That was a boost. But, it still wasn't a sale. :-)

Without further ado, here was the Market!


Thank you, thank you to everyone who helped, supported (here and from afar!), encouraged and who came and showed your lovely faces. It's wonderful to see friendly faces during such long days!! My family put up with a few freak outs (sorry guys!) and several moments and days of stress. - my sweet girl played by herself while I worked some days, my husband helped watch the girl on days he was home and also helped me do the heavy lifting for the show (!). My mom and mother-in-law traveled here and played with the girl while I worked and worked and my dad and father-in-law got their hands dirty and helped with some of the more complicated and bigger pieces. My in-laws also allowed me to raid their country abode for more fun antiques and great wood pieces. :-)

more Market sneek peeks!

10.10.2013


 Just another day in the life of getting ready for the Market!